


Vape coils are the unsung heroes of great vaping experiences. These small components heat e-liquids into smooth, flavorful vapor. So even the best devices struggle to impress with lackluster coils. Yet with regular care, these intricate parts endure happily for weeks, saving vapers money. This guide breaks down the fundamentals for success.
What Are Vape Coils & Why Do They Matter?
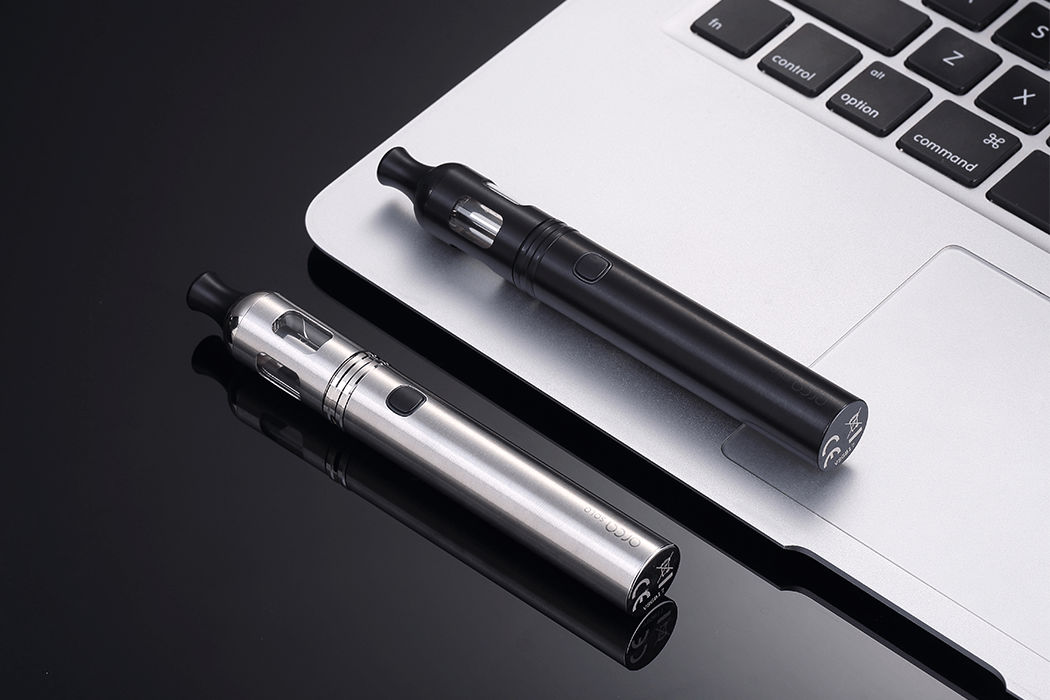
Vape coils refer to small, replaceable atomizers housing wires that heat when electrical currents flow through them. Various wicking materials like cotton surround the wires to soak up e-liquid, turning fluid into vapor when heat is applied. This vapor gets inhaled, delivering flavor and satisfaction.
With such direct contact heating up liquids before they reach your mouth and lungs, coils influence everything from thickness to taste. Consider cheaper cigarettes' unpleasant scratchy smoke versus vaping's customizable smoothness-all thanks to high-tech coils.
How Long Should Vape Coils Last?
With average use, most vape coil lifespans fall around 1-2 weeks, sometimes stretching towards a month with lighter vapers. However, numerous factors impact longevity:
1. Coil Quality
From cheap confidence trick knockoffs to meticulously built artisan varieties, quality predicts longevity. Researched brand names like Vaporesso to optimize builds balancing cost, lifespan, and pure flavors using tried manufacturing processes.
2. Power Level (Wattage)
Exceeding a coil's recommended wattage range overwhelms the system, causing rapid burnouts. Read suggested ranges and start low, increasing slowly to optimize use.
3. Usage Frequency
The coil withstands more wear from heavy all-day use compared to occasional light puffing. Consider quantity too - constantly swapping flavored juices gunks coils faster.
4. E-Liquid Thickness
Thinner, PG-based juices vaporize more easily than viscous, sweet VG liquids and sugary additives which strain components working harder to break down thicker consistency fluids.
5. Maintenance Practices
Just like changing oil in cars regularly, clean coils last longer. Following best practices optimizes coil investment.
How to Clean Your Vape Coils
Cleaning coils helps them last longer before needing replacement. Here is a step-by-step way to thoroughly revive gunky coils:
- Rinse Coil and Tank: Once performance drops, start by removing the tank and detaching the coil. Rinse tank and coil parts under hot sink water to rinse away sticky residual juices on surfaces that you can see. This clears some visible grime.
- Soak in Vinegar Bath: Mix equal parts warm water and cheap white vinegar as a bath to soak the disassembled tank and coil pieces fully submerged for about 20 minutes. The acid in vinegar gently breaks down more stubborn dirt or sticky oil residue still stuck on metal and fabric surfaces - including inside small crevices of complex coil builds where you can't scrub manually.
- Rinse After Vinegar Soak: After the soak, give the tank and coil parts another thorough rinse under clean hot water to flush away all loosened residue dissolved by the vinegar bath. Rinse until the water runs clear.
- Dry Burn the Wick: With the tank and parts fully washed, reattach just the coil onto your powered-off device without screwing on the tank yet. Start it at very low wattage and fire the coil for half-second "pulses" for a few bursts. This dry burns remaining gunk contaminating the cotton wick fibers inside with high heat to vaporize residue - without overheating the wire directly too much if pulses are brief. Carefully blow on coils if you see small wisps of vapor from the cotton too afterwards expelling newly loosened particles.
- Spot Clean With Soft Brush: Then use a thin soft brush dipped in rubbing alcohol or high-proof neutral spirits and gently rotate cleansing the inside crevices of opened-up coil builds which are accessible. Dislodge and dissolve any further stuck-on dirt or oil buildup on wire surfaces inside.
- Final Rinse Before Reattaching: Finally, do another round of rinsing everything off and let fully dry before reassembling the tank onto a cleaned coil and vaping as normal with fresh e-liquid. Use lower wattage initially after this deep cleaning process as a "break-in" for the next day or so.

When to Replace Your Vape Coil
Even with regular maintenance baths, there comes a point where persistent issues or performance decline indicate it's time for a fresh coil swap:
1. Muted Flavors
As coils slowly gunk up and wire protective coatings gradually burn off from repetitive heating cycles, e-liquid flavor peaks drop.
2. Decreasing Vapor
Related to the above, residue buildup impedes airflow. As wicking efficiency and heat conduction reduce, so do vapor clouds.
3. Spitting Liquids
Excess fluid flooding air channels results in hot e-liquid spewing occasionally. As coils struggle to wick thicker juices, they spit more.
4. Gurgling Noises
Associated with the above flooding factors, bubbles forming indicate coils can't vaporize liquids fast enough. Air bubbles rise through channels.
5. Leaking Tanks
Wicking issues also cause excess fluid to leak through air vents instead of getting properly vaporized. Coil connections may need reseating as well if they appear around the base.
6. Burnt, Metallic Tastes
Once wick saturation dips too low to cool the wire or after residue buildup insulates heat instead of conducting it, you'll taste consequences.
7. Dark E-Liquid
Like burnt leftovers in pans, prolonged excessive heating alters e-liquid color, indicating coils lose heat efficiency from gunking or age degradation.
When you notice multiple symptoms stacking up, replacing coils often remedies problems before they worsen. Prioritize at first hints of burnt tastes though as inhaling metallic dry burns harms lungs.

How to Change Your Vape Coil
Swapping coils only takes a few easy steps:
- Turn the device off and unscrew the tank to access the used coil. Dispose of it properly.
- Inspect sealing gasket rings for any wear and confirm that the new coil fits the matched tank before insertion.
- Screw in the crisp white replacement coil firmly until snugly secured.
- Refill tank and let sit for 10 minutes, allowing wicking saturation before the first vape.
- Start at the low end of the recommended wattage range for breaking in coils slowly.
Follow these steps whenever swapping atomizers. Letting wicks fully absorb surrounding juices prevents initial dry burns. Lower wattages also give fresh coils time to expand into shape.
Common Coil Issues & Solutions
Beyond replacing aging coils, try these troubleshooting steps if problems emerge:
1. Burnt Taste?
If hitting wattage maxes, residue buildup can insulate wires retaining heat instead of dispersing it. Scrub coils in vinegar then run under tap water to restore performance. Consider lowering power settings as well.
2. Spitbacks?
Centering airholes on the side of the base helps prevent flooding. Tilt tank allowing bubbles to surface then fire briefly dispersing excess liquids as vapor instead. Wipe residue off drip tips as needed.
3. Gurgles or Leaks?
Empty tanks fully then gently blow through air slots clearing any obstructions before wiping away excess e-liquid from vent holes. Examine o-rings ensuring seals aren't compromised. Confirm coil is properly threaded.
Following some simple maintenance best practices helps avoid many aggravations - extending fulfilling experiences with beloved setups. Take time to understand these intricate components.
Vape coils are small but mighty parts - directly responsible for producing smooth, flavorful vapor from devices. While too often overlooked, with some basic maintenance like regular cleaning, checking connections, and replacing when declining, coils can be kept happy for weeks of quality performance. Follow the troubleshooting tips here to identify issues fast and restore clouds.


COMMENTS