


As a newbie to the world of vaping, you’re probably still feeling a little bit iffy about some of the really strange sounding terms around. Things like RDAs, for example. In this Vaping 101 blog, we’ll try to clear the air (not of vapour, we want more of that!) around some of the general questions you’re likely to have with RDAs at this point.
What is an RDA?
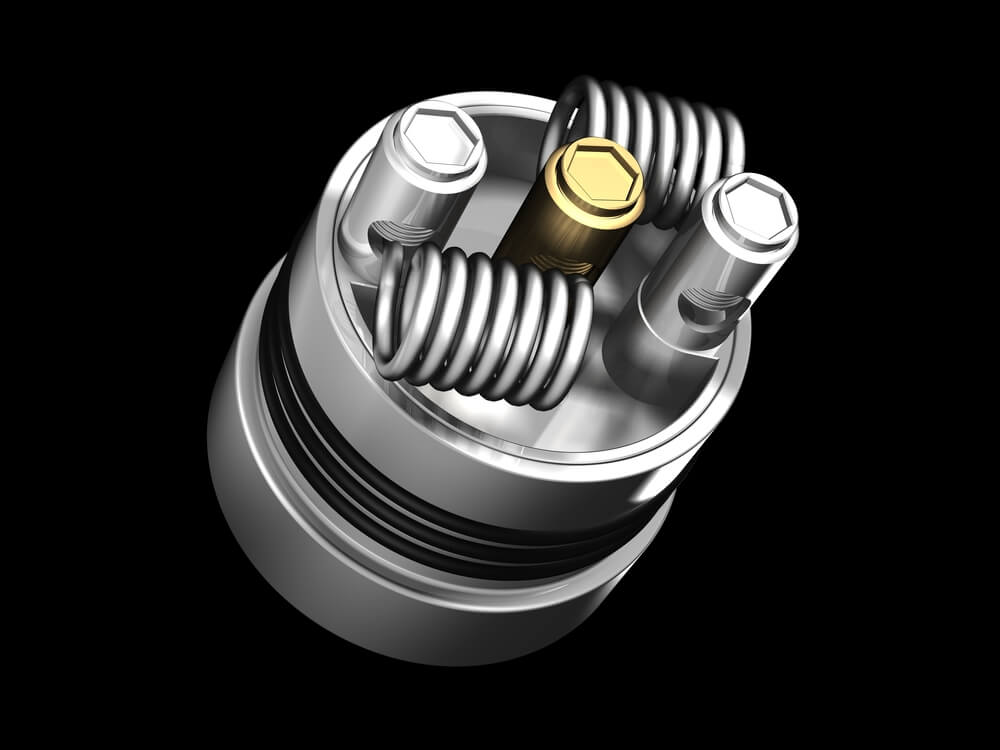
RDA stands for rebuildable dripping atomizer. If you’ll recall, from some earlier vaping 101 blogs, the vape atomizer is the part of the vaporizer that is responsible for heating the e-liquid and turning it into vapour.
Dripping atomizers differ from other vape atomizers in that you have to physically drip the e-liquid onto a wick in the device. Rebuildable dripping atomizers are meant to be used in non-disposable vaping devices, so that you can continue to get maximum enjoyment from your device without having to replace the entire thing!
How does it work?

The simple process required to use an RDA is simply to drip your e-liquid onto the coil and then to insert the RDA back into the vaporizer for use. However, being a rebuildable component means that every so often, you’ll need to replace the wicks and the coil of the vape atomizer so that it can continue to function just how you want it to give you your ultimate vape experience!
Can I rebuild it myself?

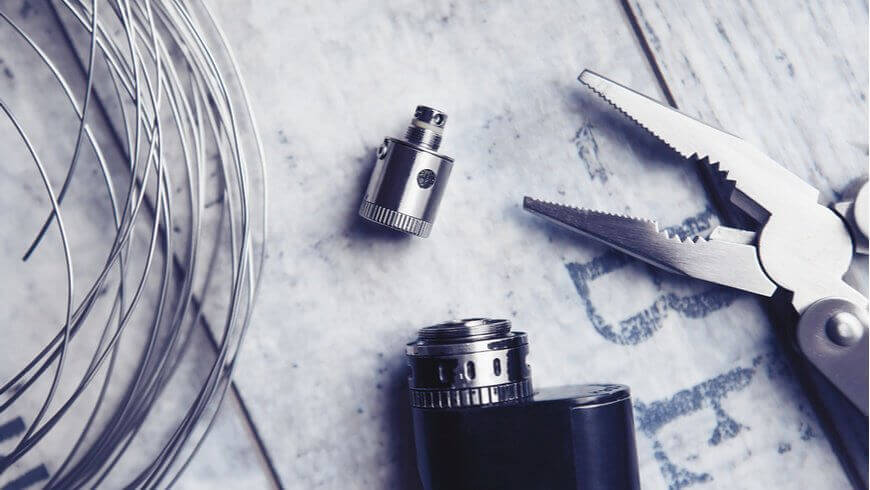
Yes. Rebuilding the vape atomizer (replacing the coils and wick) is a fairly simple process, which takes a little bit of practice to get to the point where you feel like you can do it as often as you need to.
You'll require a tool-kit of small tools, such as pliers and screwdrivers, and then building your deck is a case of choosing your coil (different wire types have different resistances and heat up differently), and winding it around the posts of the deck which conduct the electricity to the coil. Screw it tight, add your wick (commonly organic Japanese cotton), and add your casing: You're ready to drip!
Why should I use an RDA?

These components are made to enhance your vaping by offering a customisable experience not available with simple and disposable vaporizers. It takes a bit of experimentation and good old-fashioned DIY (and fun creativity) to find what you’re really looking for, but the results will definitely be worth it!
For one, RDAs offer a flavour sensation that is difficult to come by with other vaping components. The reason for this is mostly that you’re able to saturate the wicks with as much of your chosen flavoured juice as you want.They are also known to produce bigger clouds of vapour - something you’ll come to enjoy more and more as you discover some fun tricks you can do when vaping!
RDAs are also the way to go if you feel like you’re going to want to try a few new flavours without having to wait for a whole tank of liquid to be finished - you can simply take the wick out and rebuild it yourself! Then drip your new flavour onto the coil and get vaping again pronto!
Do I have to be an expert to use an RDA?

No, expert status is not required to use an RDA. However, you will have to get a little bit savvy with building your own coils before you can really start to use your RDA to its full effect. Using an RDA and experimenting with rebuilds is one of the first steps in your journey from beginner to advanced vaping.
Like everything in the vape world, components are evolving fast. So be sure to check out some of the latest RDA technology to get an idea of where your vaping journey can take you.
Stay tuned for more blogs in our Vaping 101 series. Happy vaping!

COMMENTS